使用指南
自定义域名配置步骤
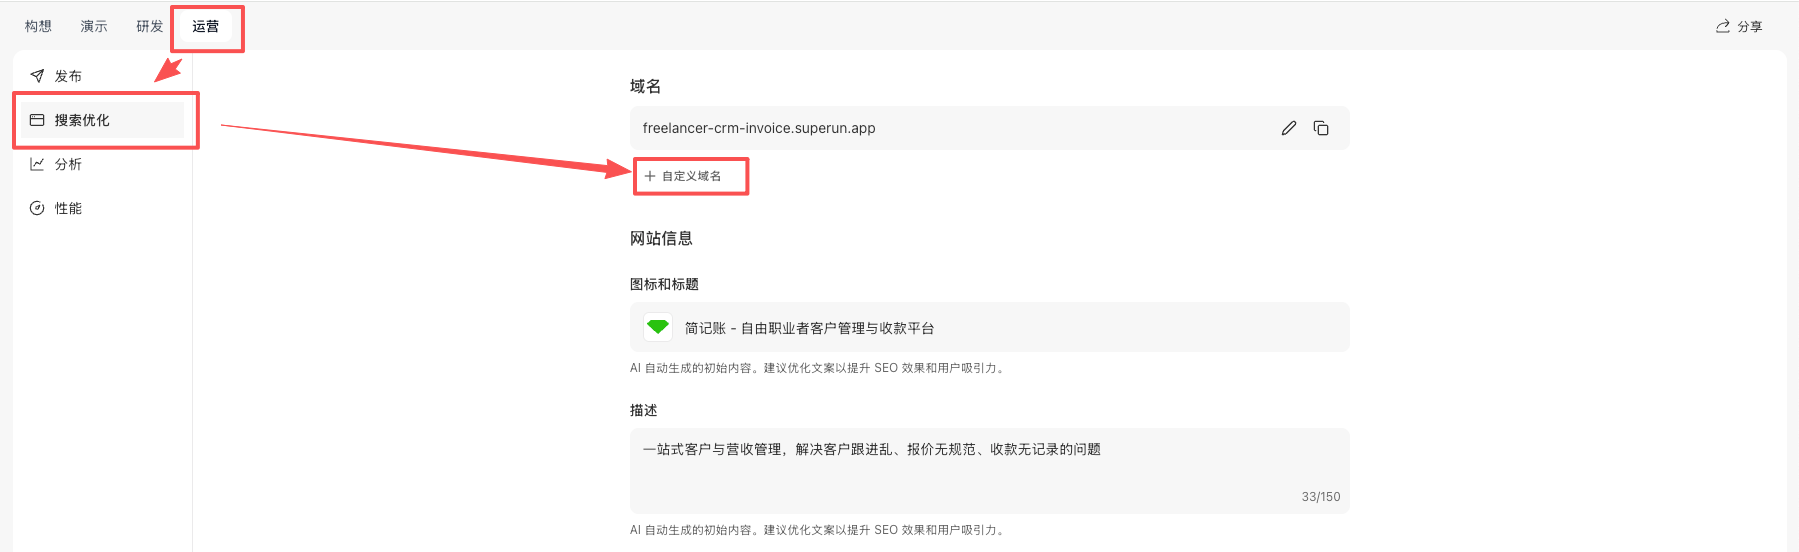
通过 superun 后台配置自定义域名,可以将您的项目绑定到自己的域名上,提升品牌形象和 SEO 效果。国内域名:绑定前请先阅读 自定义域 中的说明;须与产品内「自定义域名须知」弹窗一致,完成 ICP 备案 与 腾讯云接入备案。配置步骤:
-
进入搜索优化设置
- 在项目页面,点击顶部导航栏的 运营 标签
- 在左侧边栏中,点击 搜索优化
- 在”域名”区域,点击 + 自定义域名 按钮
-
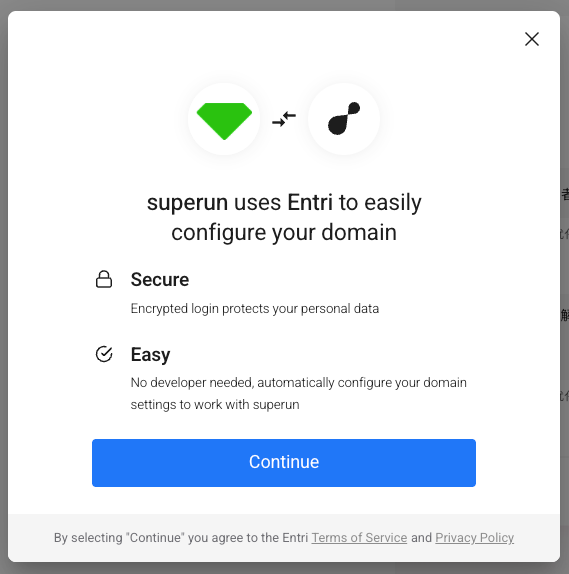
开始配置流程
- 弹出配置对话框后,点击 Continue 按钮继续
-
输入域名
- 在输入框中输入您的一级域名(例如:
yourdomain.com) - 如果需要使用子域名,可以勾选 “I want to use a subdomain” 选项
- 输入完成后,点击 Continue 按钮
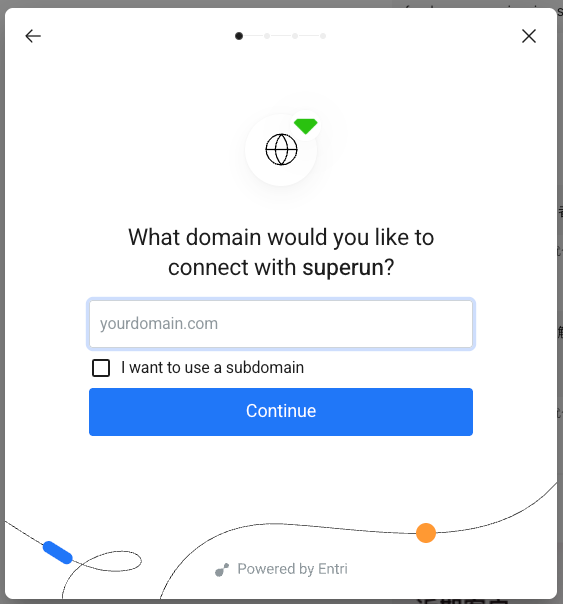
- 在输入框中输入您的一级域名(例如:
-
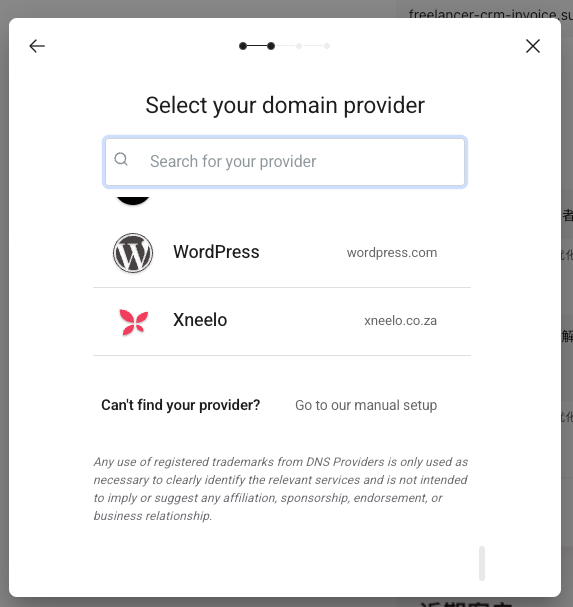
选择域名提供商
- 如果您的域名提供商在列表中,可以直接选择
- 如果找不到您的提供商,请下拉到页面最下方
- 点击 Go to our manual setup 进入手动配置
-
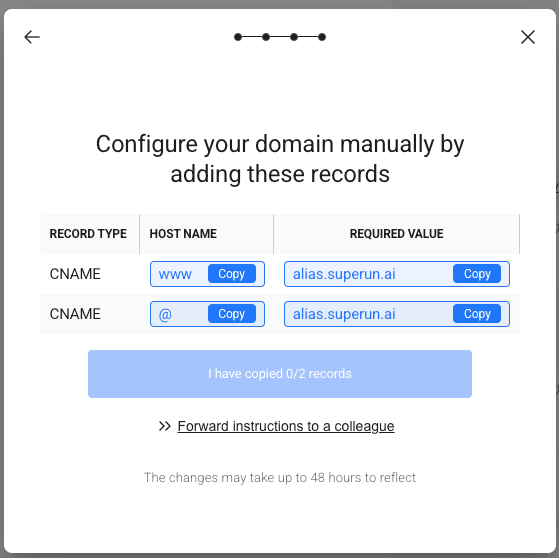
配置 DNS 记录
- 在”Configure your domain manually by adding these records”页面,您会看到需要添加的 DNS 记录
- 需要添加两条 CNAME 记录:
- 第一条记录:
- RECORD TYPE:
CNAME - HOST NAME:
www - REQUIRED VALUE:
[系统提供的目标地址]
- RECORD TYPE:
- 第二条记录:
- RECORD TYPE:
CNAME - HOST NAME:
@ - REQUIRED VALUE:
[系统提供的目标地址]
- RECORD TYPE:
- 第一条记录:
- 点击每条记录旁边的 Copy 按钮,复制对应的值
- 前往您的域名服务商(如阿里云、腾讯云等)的 DNS 管理后台
- 添加这两条 CNAME 记录
-
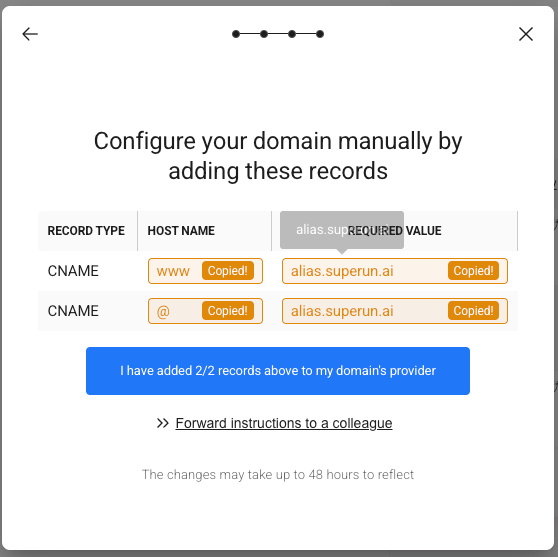
确认配置完成
- 在域名服务商完成 DNS 记录配置后,返回 superun 配置页面
- 点击 I have added 2/2 records above to my domain’s provider 按钮
-
完成配置
- 等待系统验证 DNS 记录(可能需要几分钟到几小时)
- 配置成功后,点击 Done 按钮完成设置
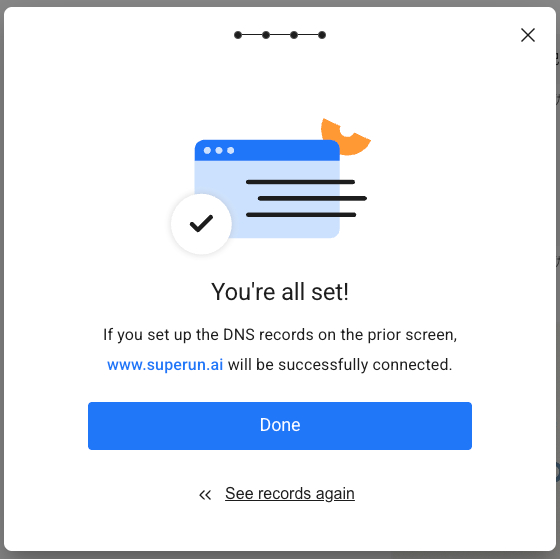
- DNS 记录变更可能需要 48 小时 才能完全生效
- 请确保在域名服务商正确添加了两条 CNAME 记录
- SSL 证书会自动申请和配置,无需手动操作
- 如果配置后无法访问,请检查 DNS 记录是否正确添加
- 找不到域名提供商:可以选择手动配置(Go to our manual setup)
- DNS 记录添加后仍无法访问:请等待 DNS 传播完成(最多 48 小时)
- SSL 证书未生效:SSL 证书会在 DNS 记录生效后自动申请,请耐心等待
- 301 重定向 / 域名跳转:301 跳转需在你的域名管理平台(如阿里云、腾讯云)的 DNS / 解析设置里配置,与 superun 无关
问题解决
域名绑定失败
问题现象:- GoDaddy 一级域名无法直接绑定 CNAME
- 域名解析后跳转到 superun 首页
- 使用 Cloudflare:将域名的 nameserver 改到 Cloudflare,然后通过后台绑定
- 在域名注册商处将 nameserver 改为 Cloudflare 提供的地址
- 在 superun 后台通过 Cloudflare 绑定域名
- 手动告诉AI:先使用”咨询”模式询问:
- 根据AI的建议确认需要修改的域名
- 如果确认需要,再在对话中明确告诉AI正确的域名,让AI修改配置