使用技巧
需求澄清后的页面步骤操作
在提交初始提示后,superun 会进行需求澄清,然后进入页面步骤阶段.在这个阶段,你可以根据情况选择不同的操作方式.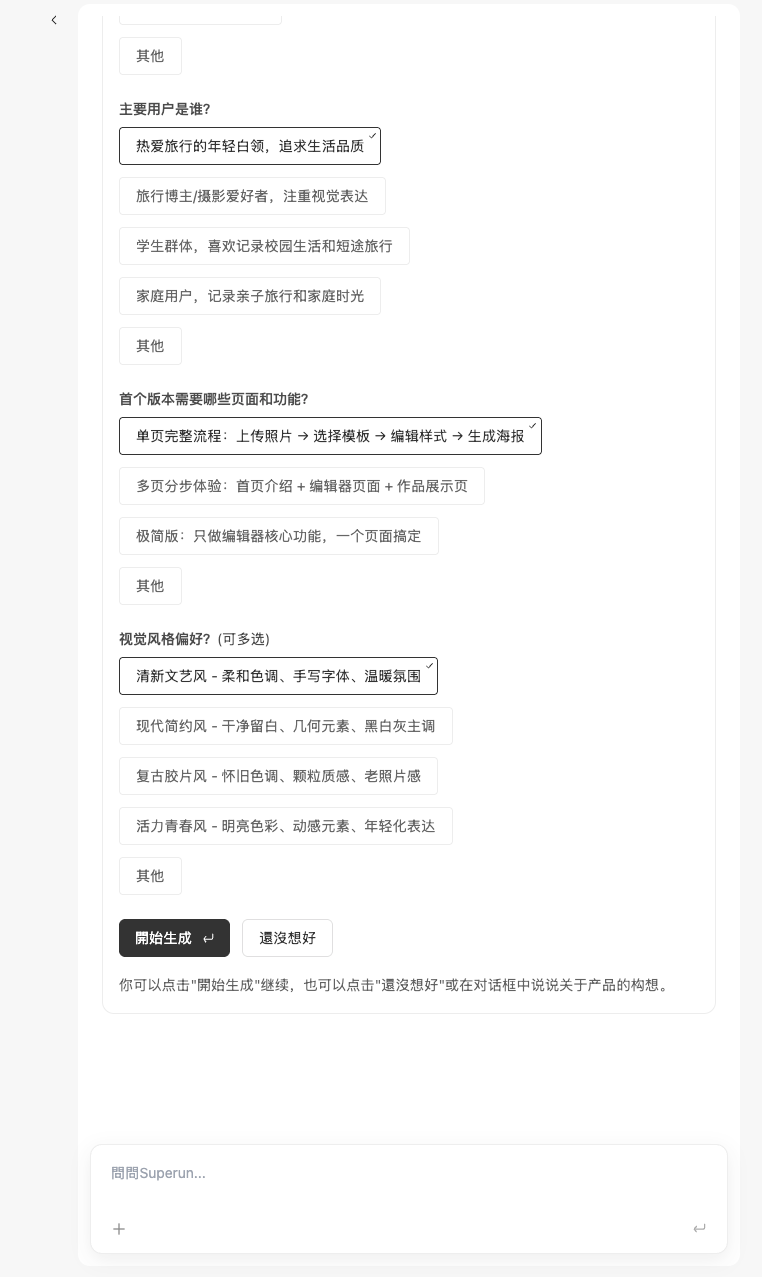 操作选项:
操作选项:
-
符合预期,直接开始生成
- 如果页面步骤符合你的预期,可以直接点击「开始生成」按钮
- 系统会根据这些步骤进行后续的生成流程
-
不符合预期,但不知道怎么描述
- 如果觉得不符合预期,但不知道如何描述问题
- 可以点击「还没想好」按钮
- 模型会重新给你一些选项供你选择
-
有自己的想法,想要调整
- 如果对页面步骤有自己的想法或需要调整
- 可以在对话框中直接输入你的需求
- 模型会结合你这次描述的内容,重新生成新的选项
💡 提示:充分利用需求澄清阶段,可以让后续的生成更符合你的预期.如果不满意,不要急于继续,先调整清楚再进行下一步.
风格选择与主题预览
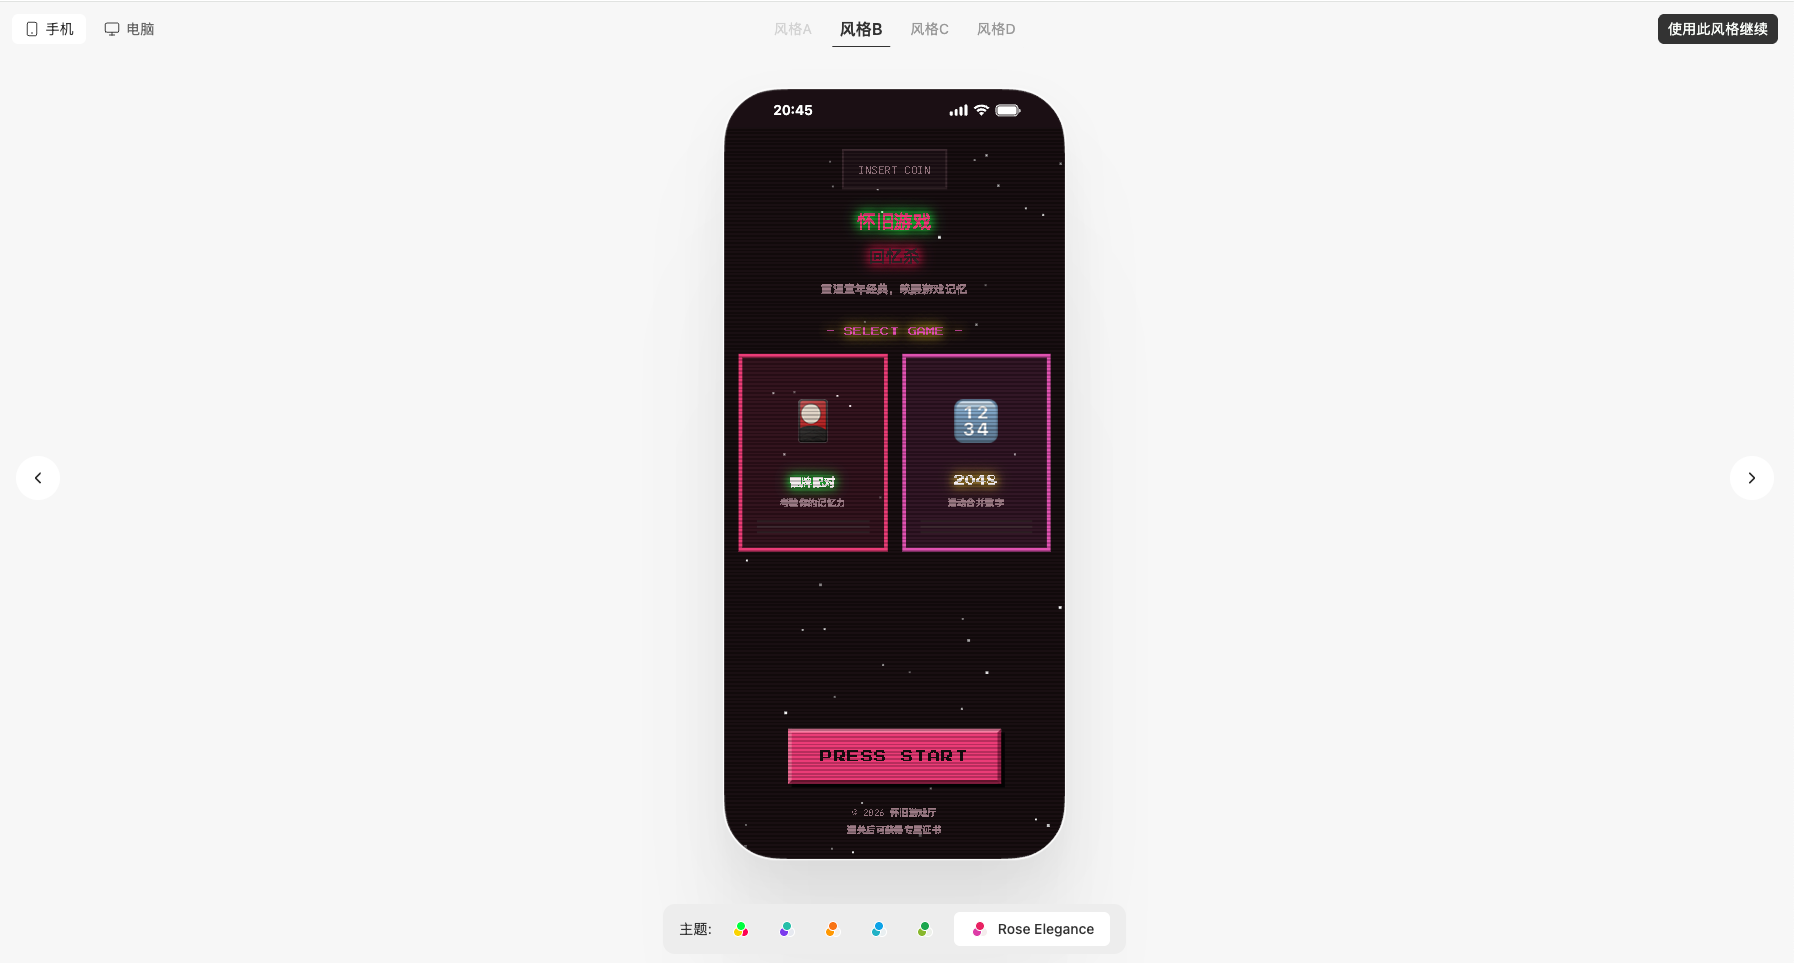
系统生成 4 种风格选项后,你可以与它们互动,找到你喜欢的风格和主题.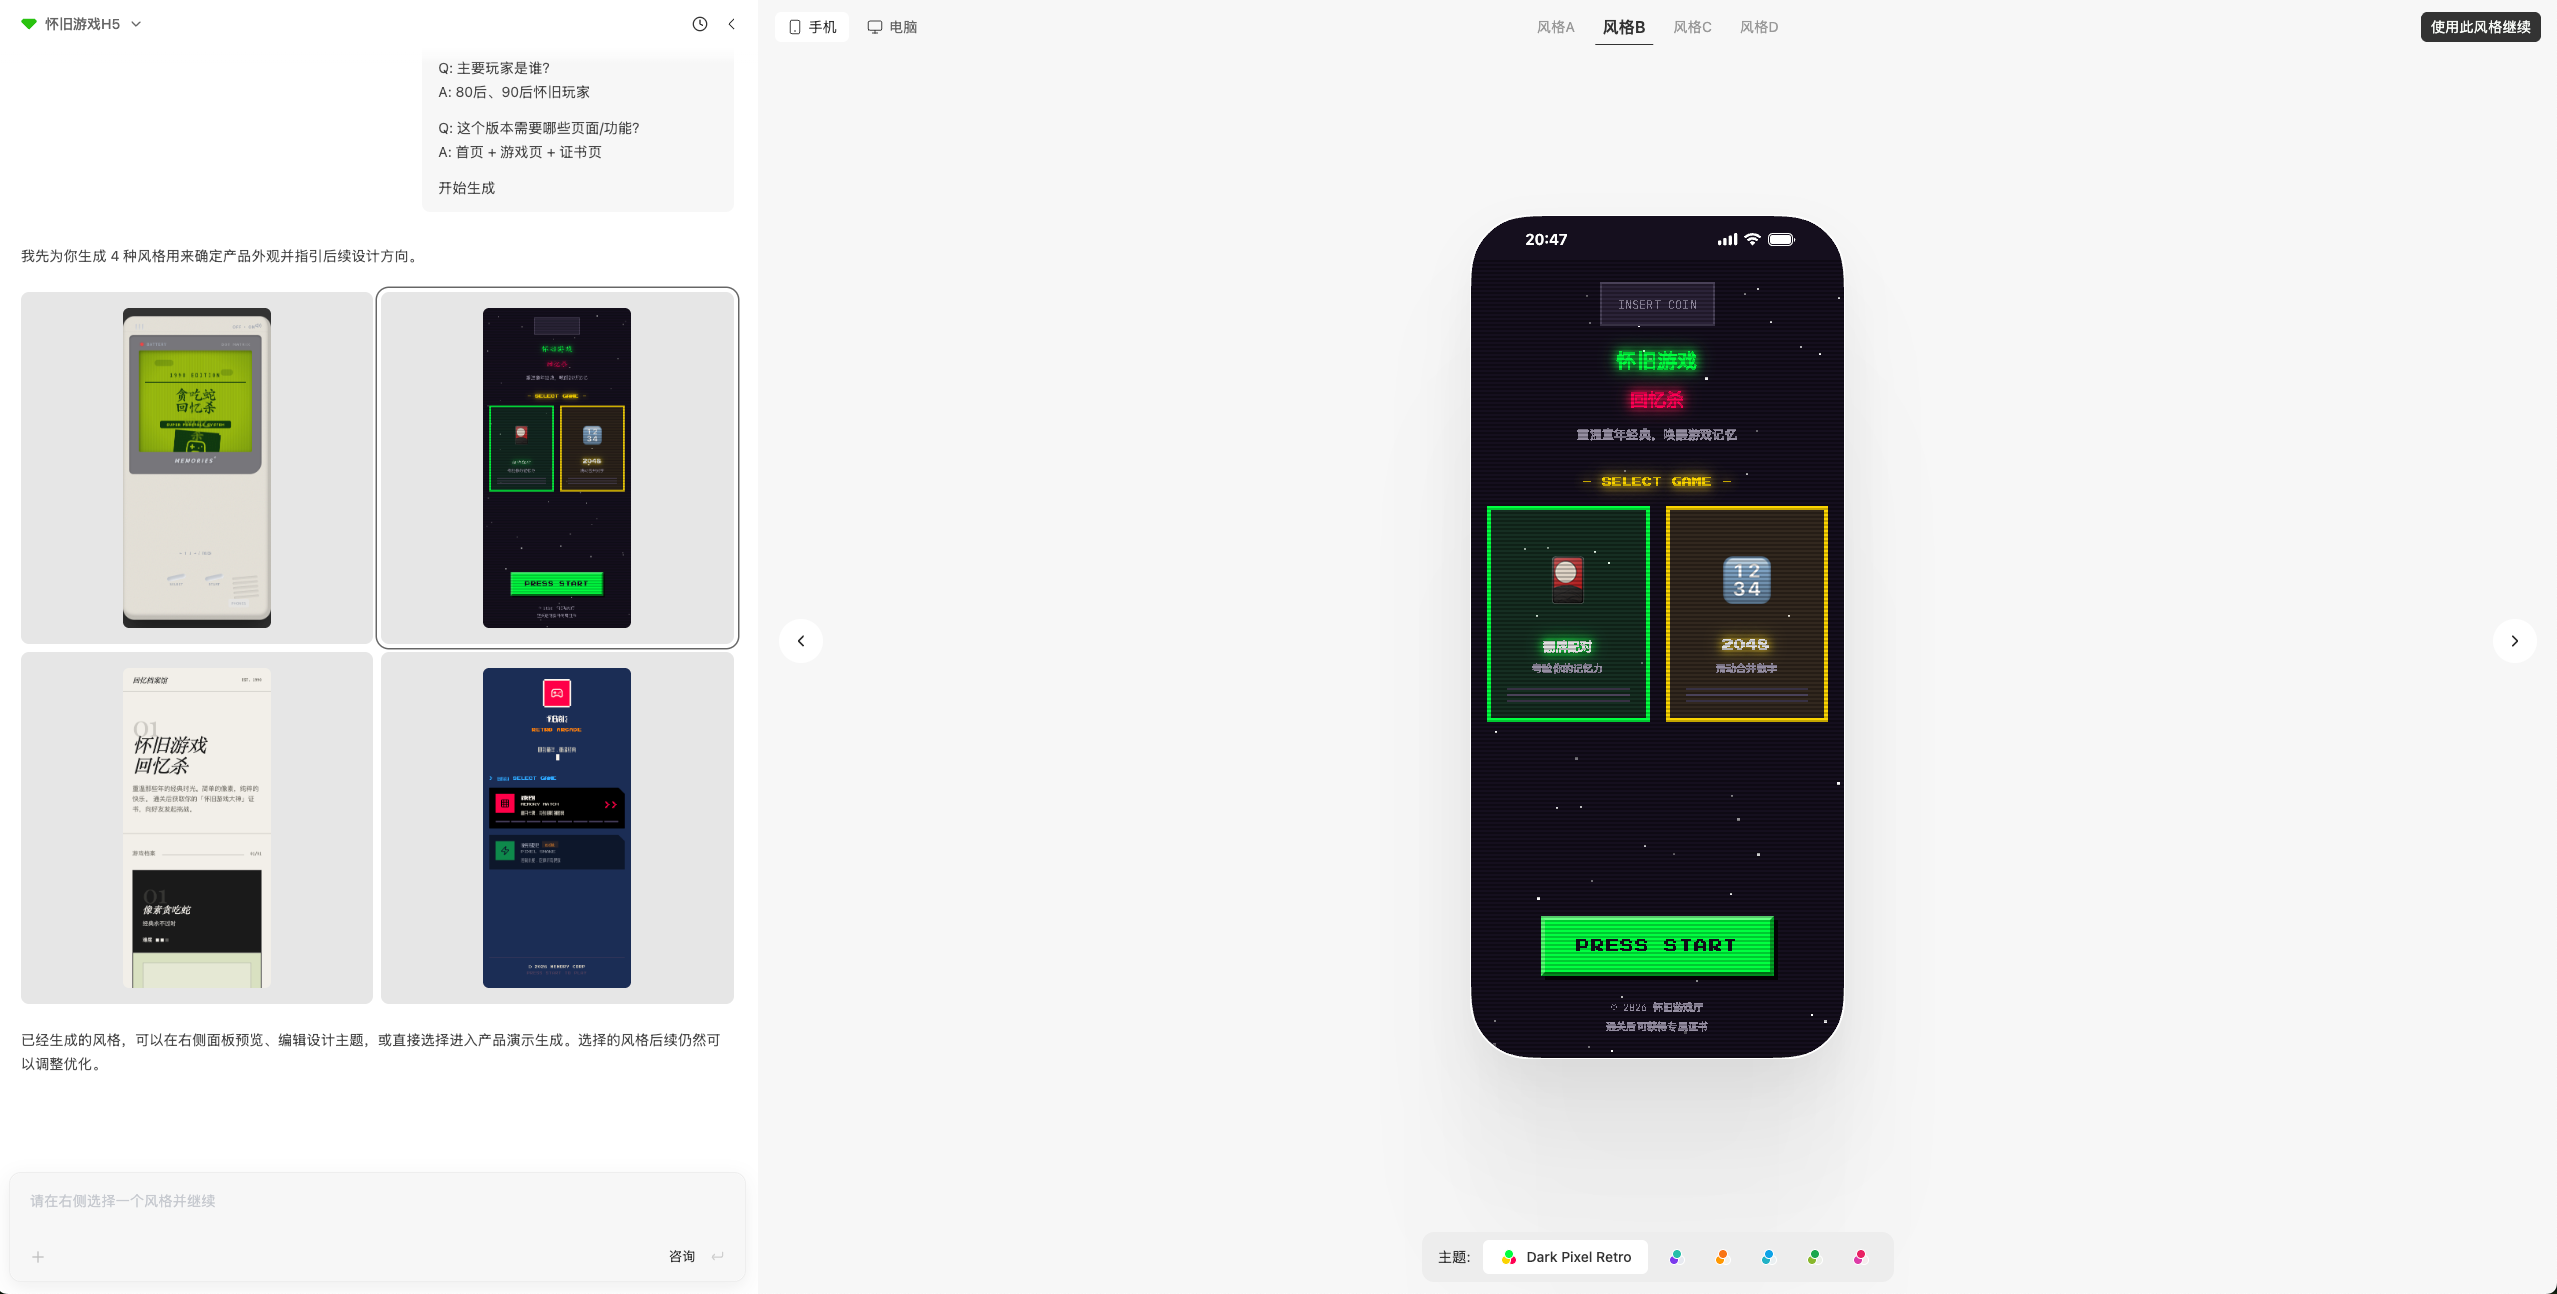 使用方法:
使用方法:
-
选择风格
- 点击任意一个生成的风格来选择它
- 每种风格代表不同的设计方向
-
预览主题
- 在页面底部有主题颜色选择器
- 滑动主题颜色选择器,可以看到不同主题在选中风格下的变化效果
-
应用主题
- 点击主题即可直接选中并应用
- 主题会立即应用到当前选中的风格上
-
确认并继续
- 确认风格和主题都符合你的喜好后
- 点击右上角的「会用此风格继续」按钮
- 系统将使用你选择的风格和主题生成应用
💡 提示:花时间探索不同的风格和主题组合.通过鼠标悬停预览主题,可以帮助你在最终确定选择前做出明智的决定.
生成演示版本
风格生成完成后,你可以选择生成演示版本来预览应用的使用方式.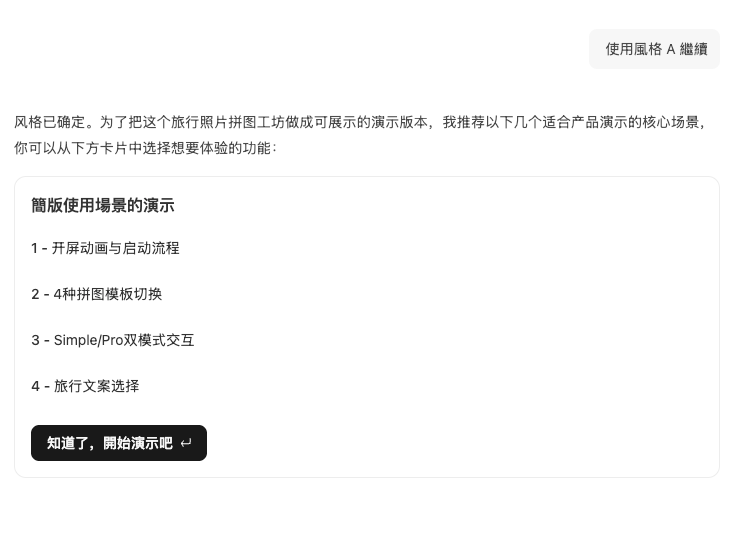 演示版本功能:
-
点击「知道了,开始演示吧」按钮
- 在风格生成完成后,点击此按钮即可生成演示版本
- 演示版本使用系统生成的测试数据
-
体验应用功能
- 演示版本是最简单的 demo 版本
- 可以进行页面切换和基本操作
- 帮助你了解应用的使用方式和交互流程
-
验证设计效果
- 通过演示版本,你可以直观地看到应用的实际效果
- 验证设计是否符合预期
- 确认功能流程是否合理
-
查看并确认演示
- 演示生成后,对话流中会有提醒
- 点击顶部导航栏中的「查看演示 →」
- 即可进行确认演示效果
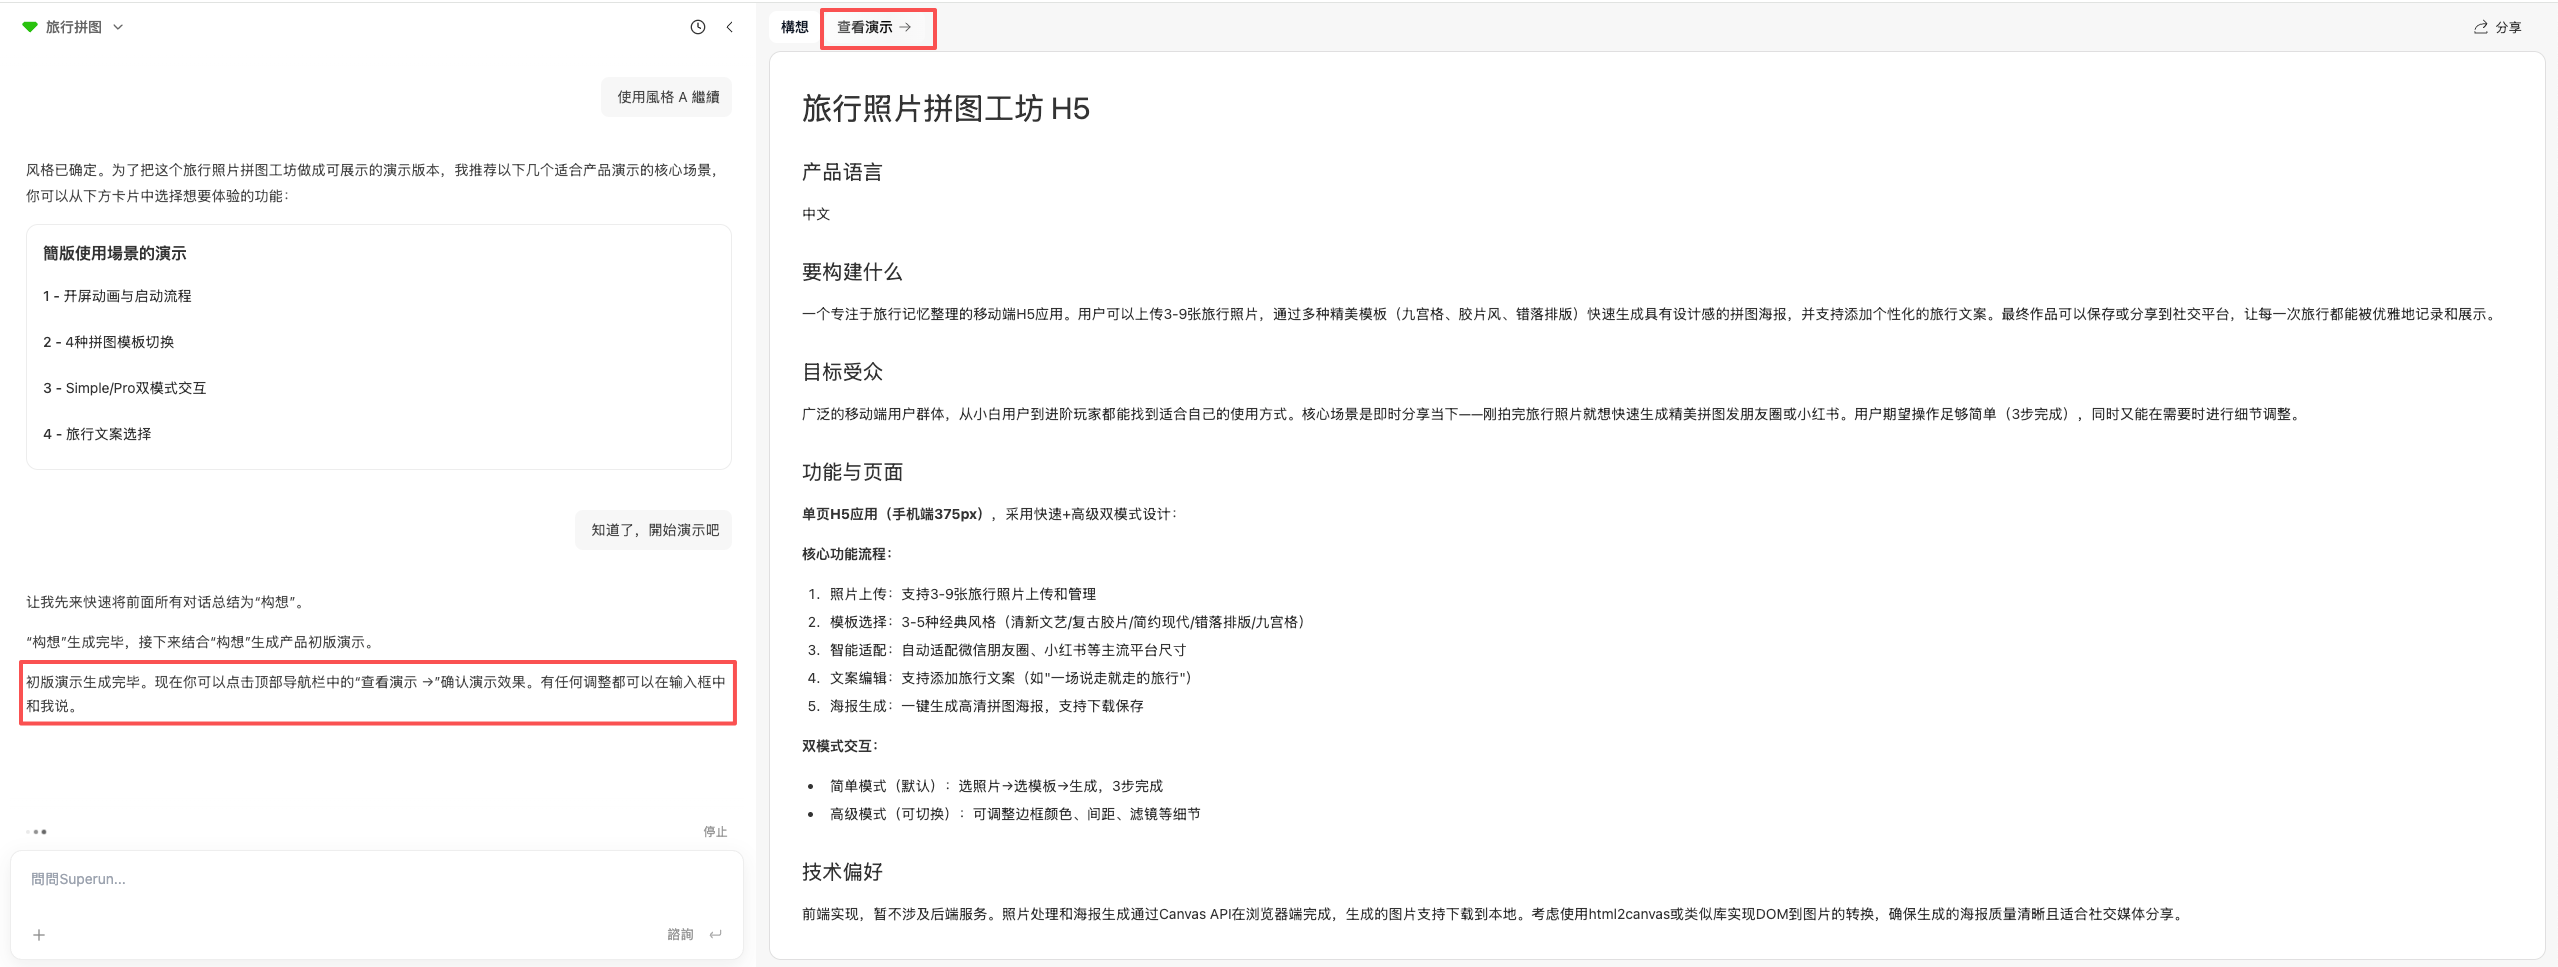
💡 提示:演示版本是快速验证设计和功能的好方法.在正式生成完整应用前,先通过演示版本了解应用的使用方式,可以帮助你更好地调整需求.
研发阶段
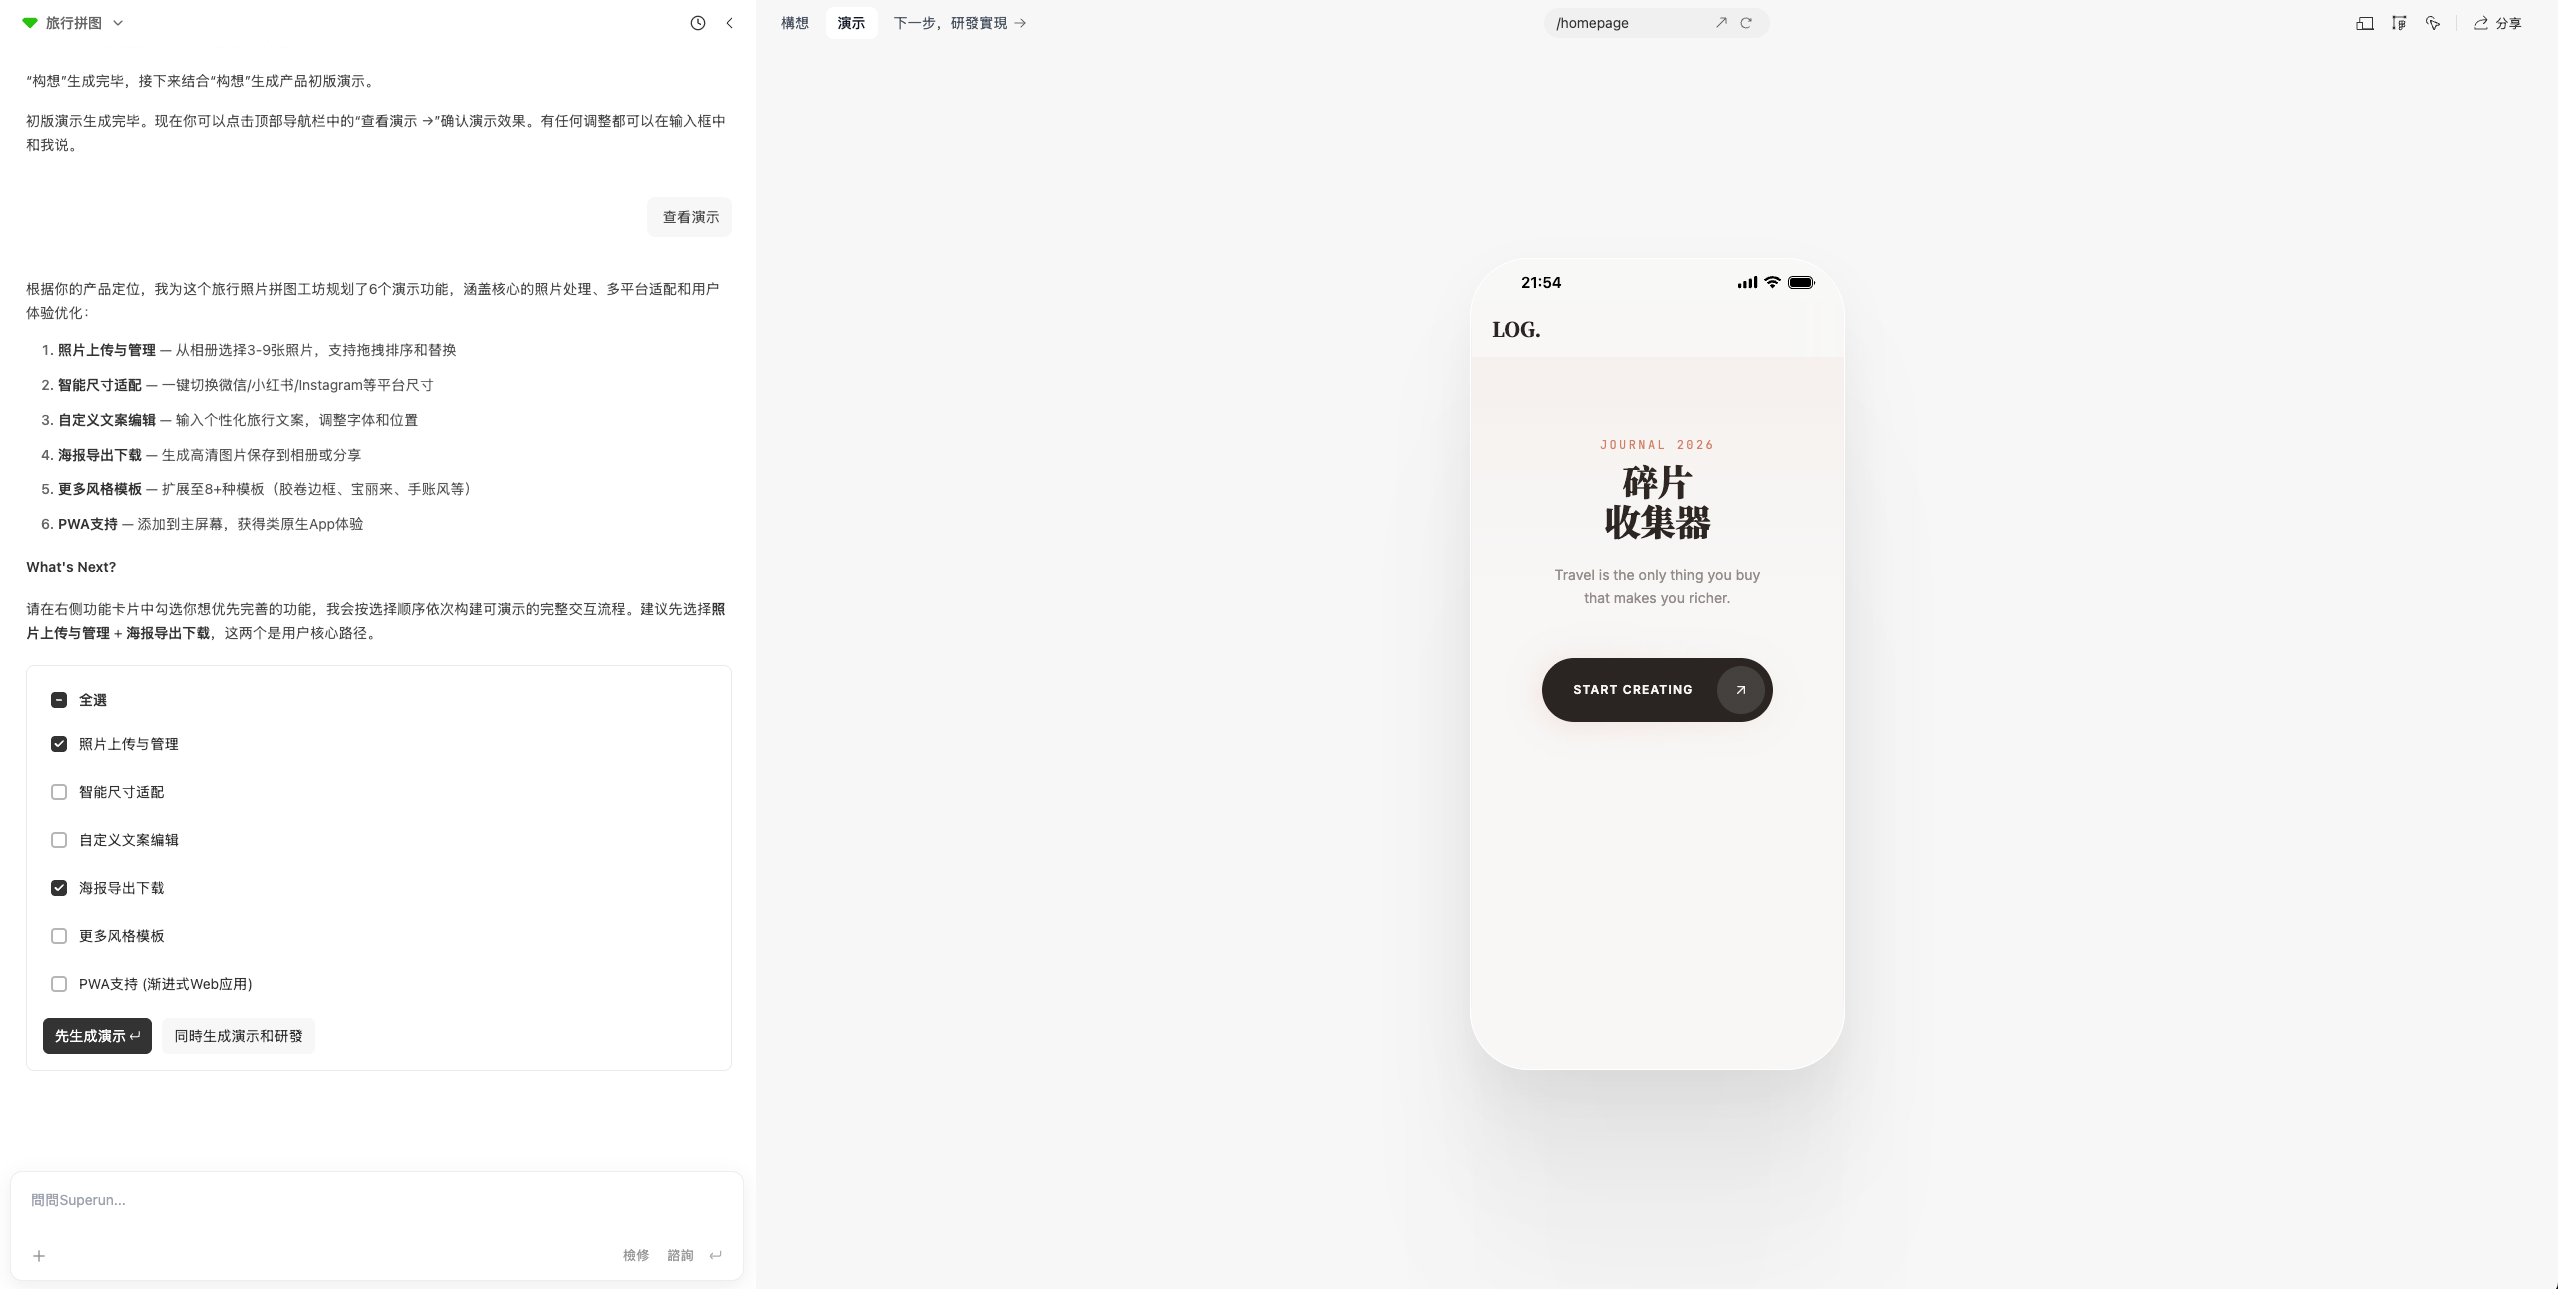
- 查看演示后的下一步选择
- 查看演示后,可以选择需要的功能点
- 点击「先生成演示」,可以根据选择的功能点生成更详细的演示功能
- 点击「同时生成演示和研发」,会根据选择的功能点直接生成真实的功能,使用真实的数据,且会提供后续的功能列表
- 或者直接点击导航栏中的「下一步,研发实现」,直接生成功能列表
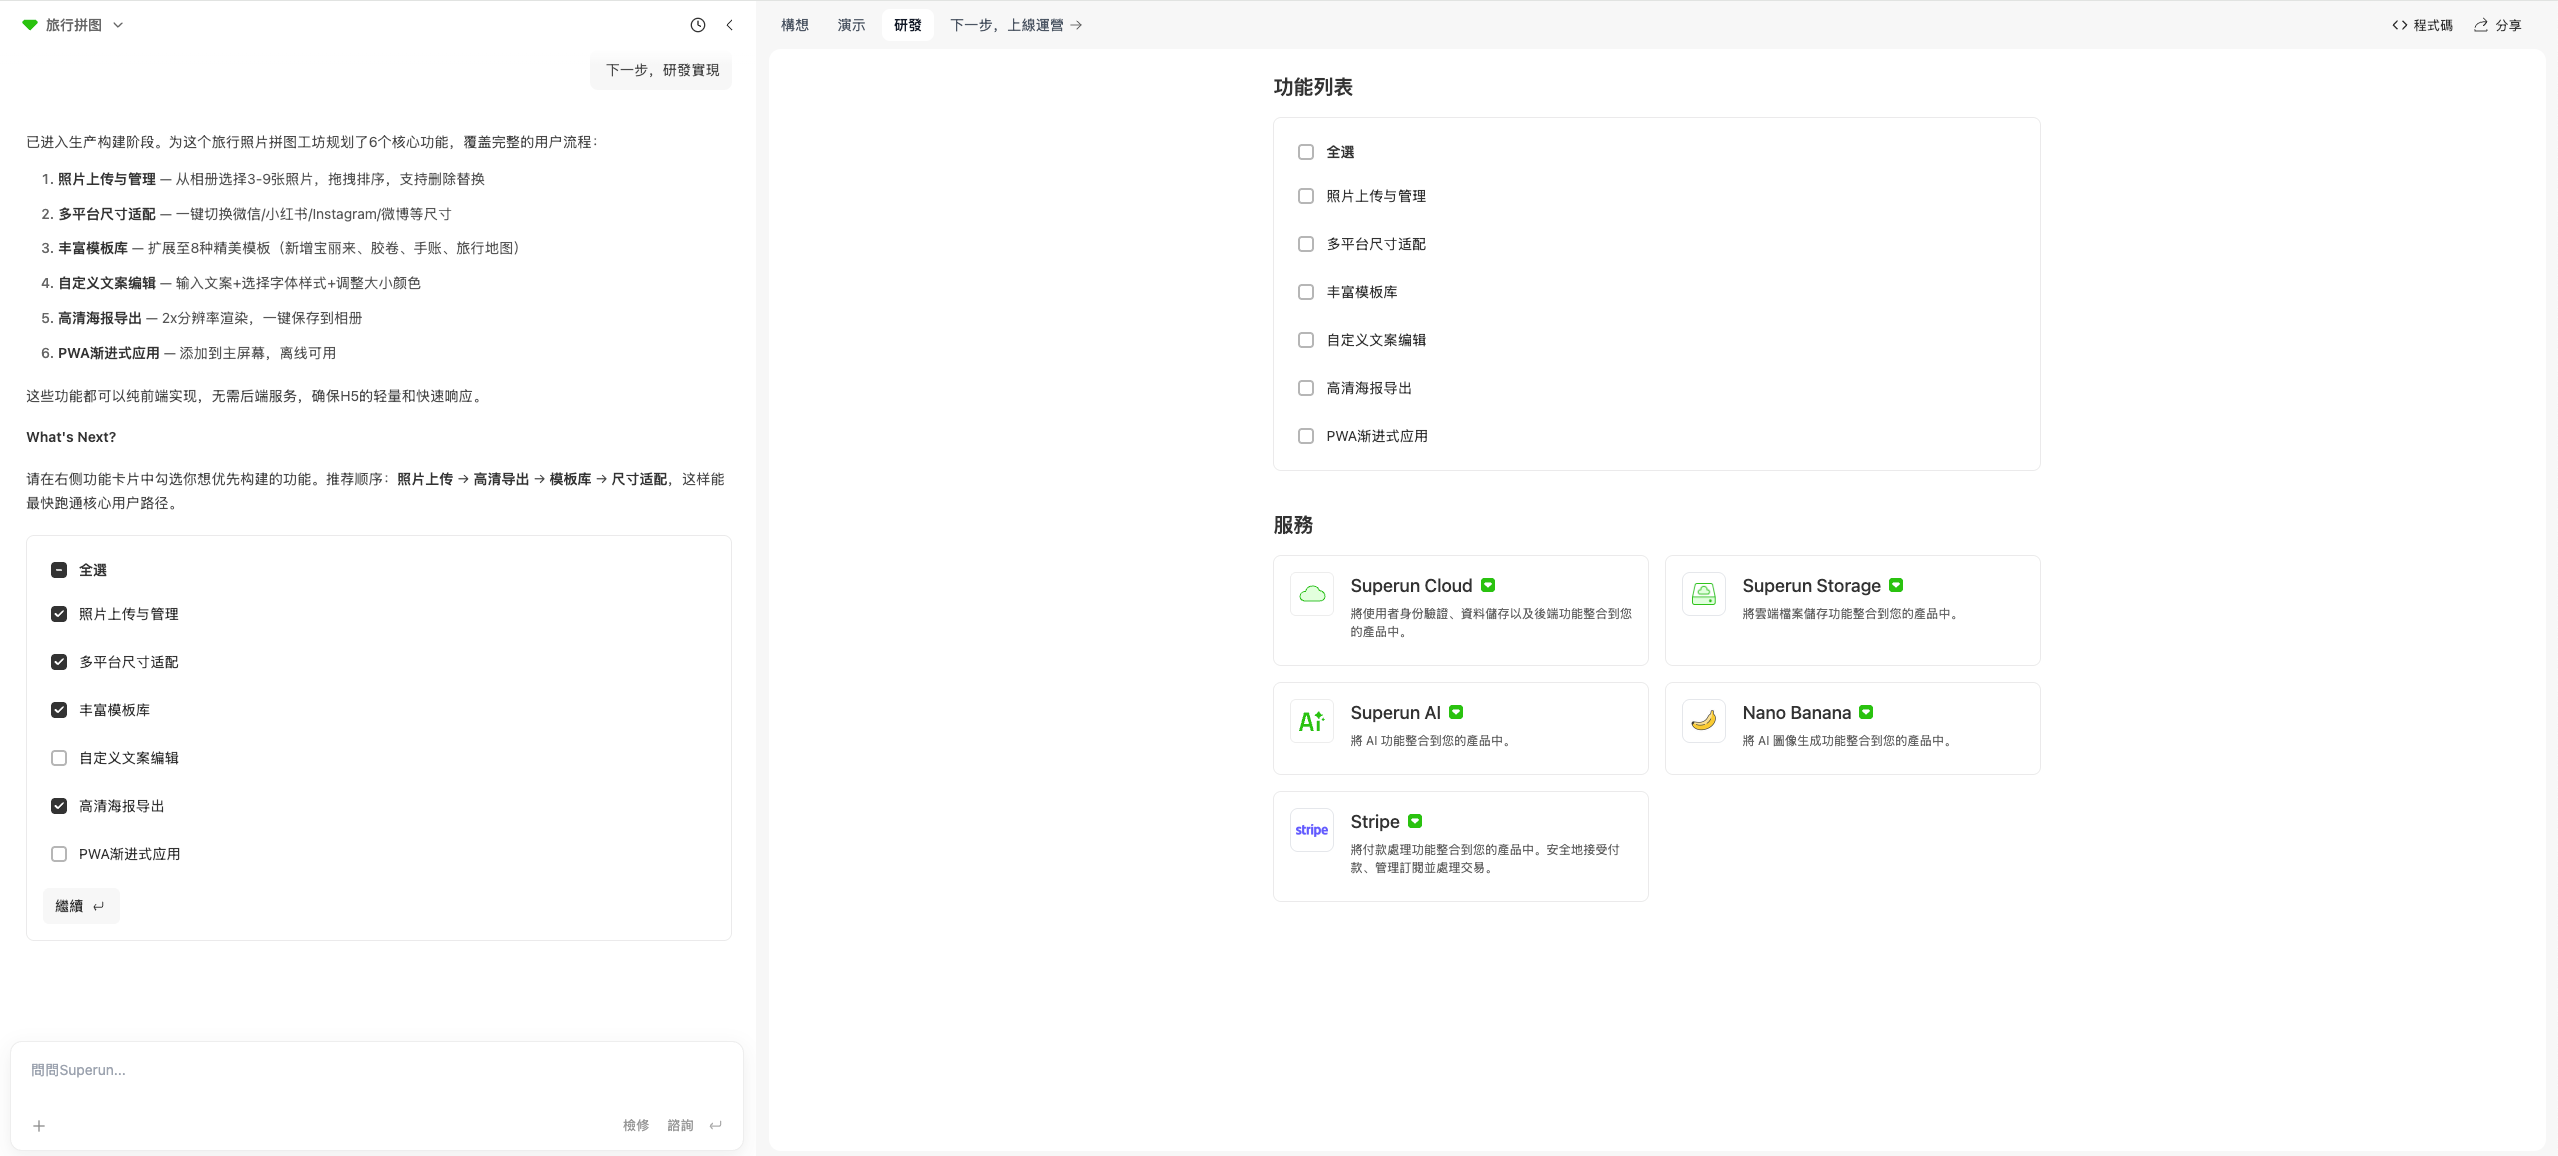
- 研发阶段的功能选择
- 在研发阶段,可以根据模型推荐顺序去勾选内容实现
- 也可以直接全选去实现
- 选择符合自己需要的功能
- 可以直接在对话流中进行选择和继续
- 也可以在研发 tab 下进行选择
- 选择继续后,只要耐心等待,superun 会根据你的选择为你实现功能
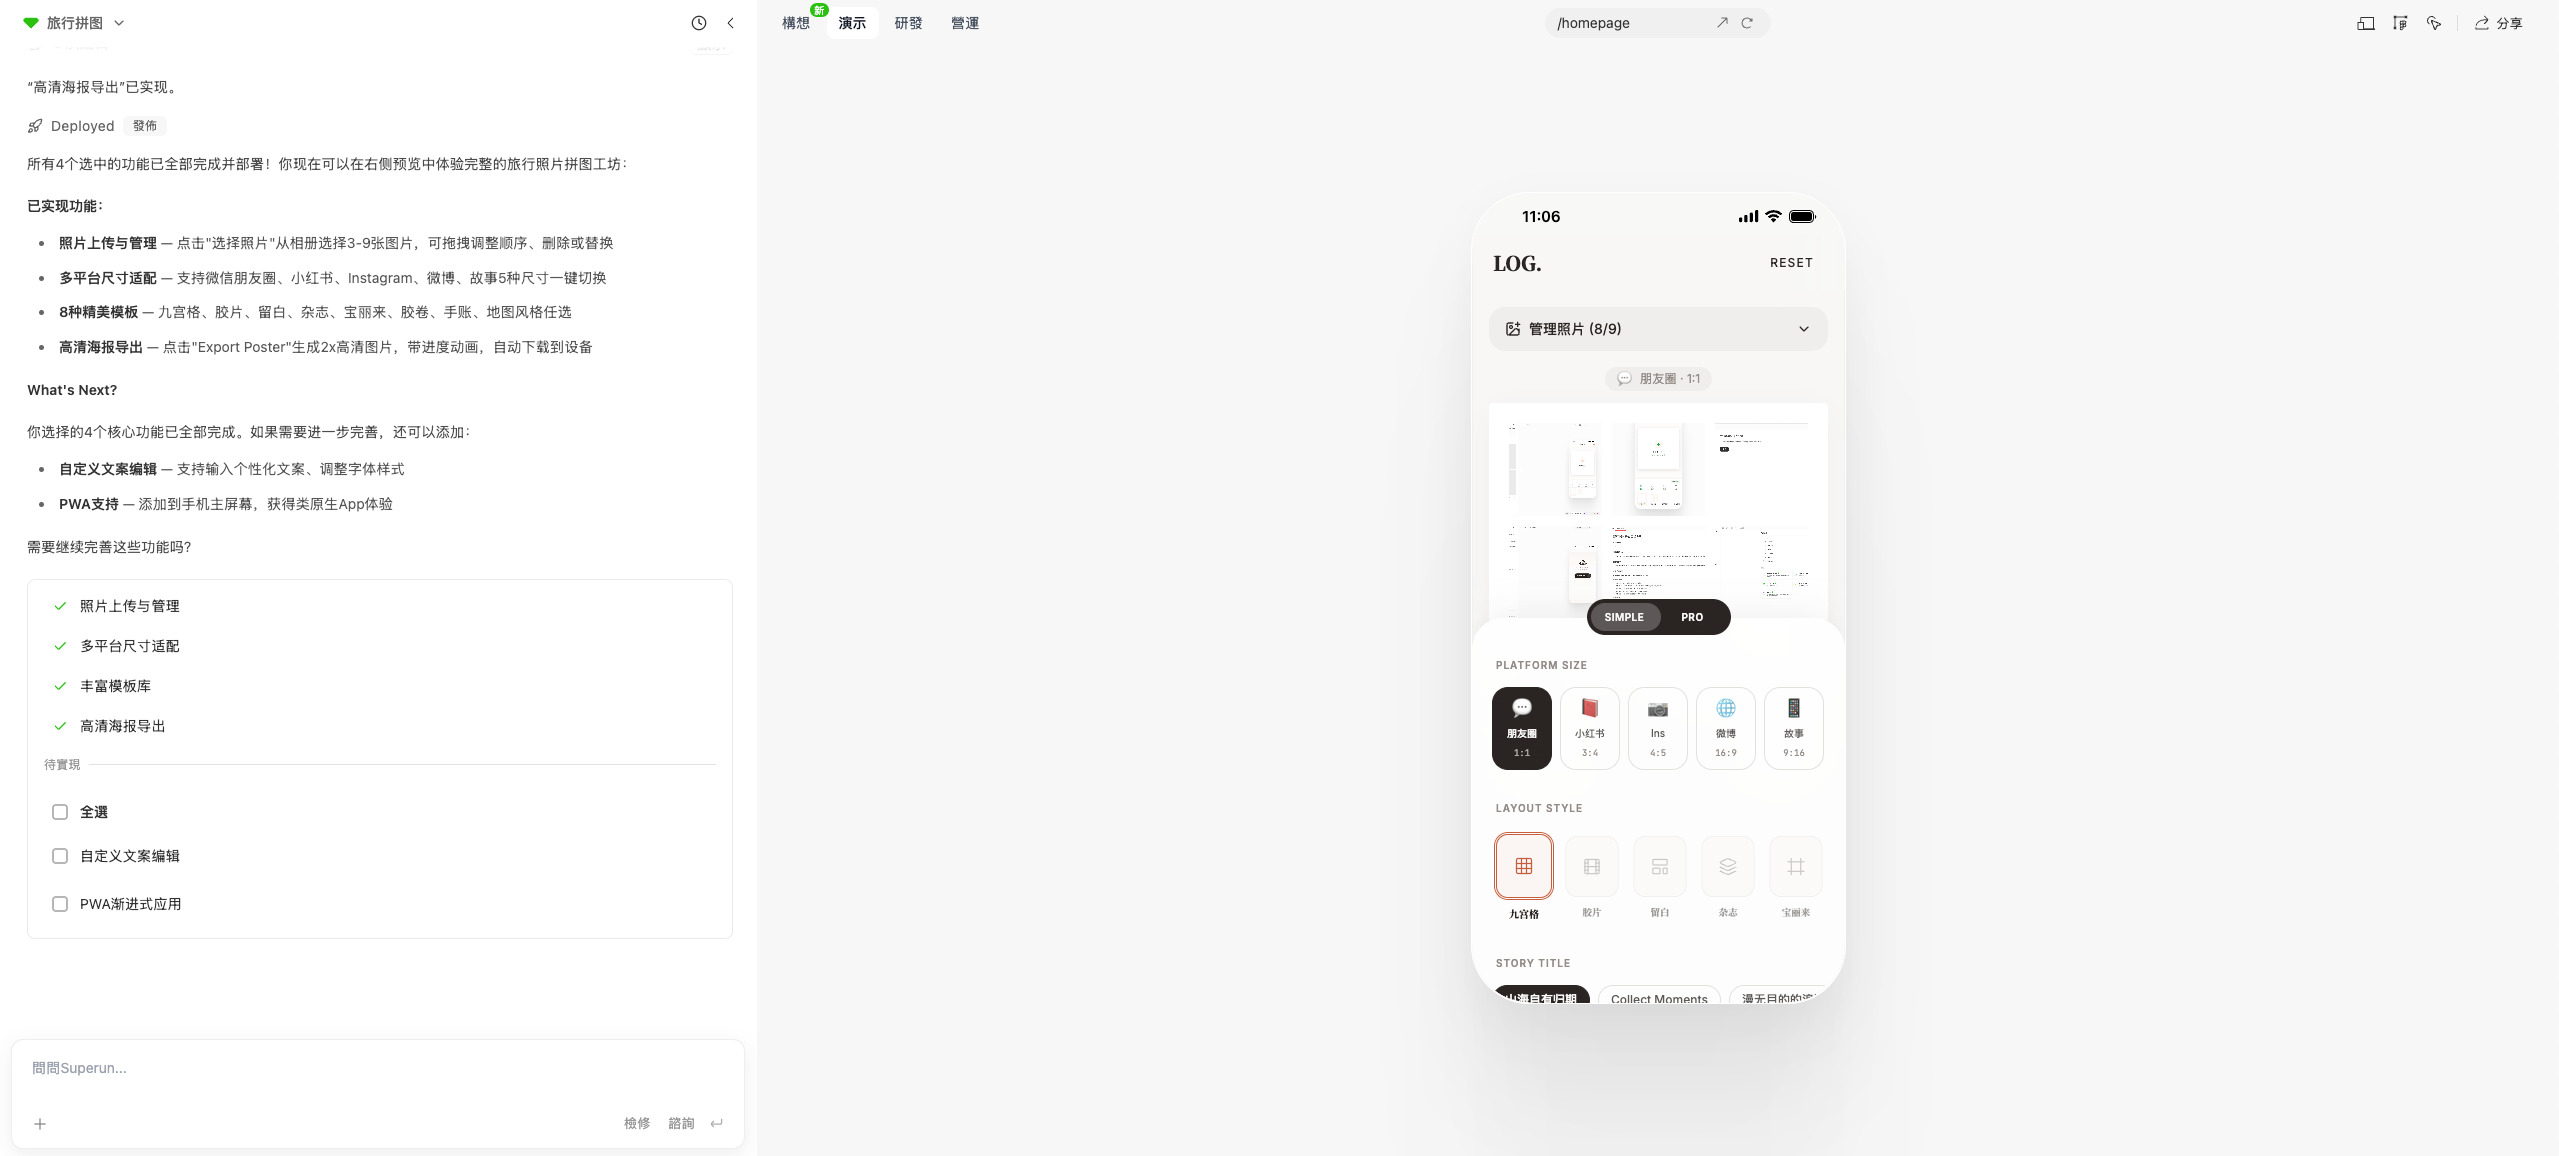
- 功能验收与继续开发
- 选择的功能研发完成后,可以对已实现的功能进行使用验收
- 如果有问题,直接在对话中提出来,让 superun 修改,直到符合你的预期
- 功能没问题后,可以继续选择剩下的功能,选择继续,进行开发
- 也可以在对话中提出自己的需求,让 superun 去实现
- 路由切换功能
- 在开发过程中,如果发现做了后台管理或其他单独路由的页面没法通过页面点击跳转到
- 可以在导航栏中间路由切换这里,会出现下拉列表
- 选择对应的页面路由就可以直接跳转到页面

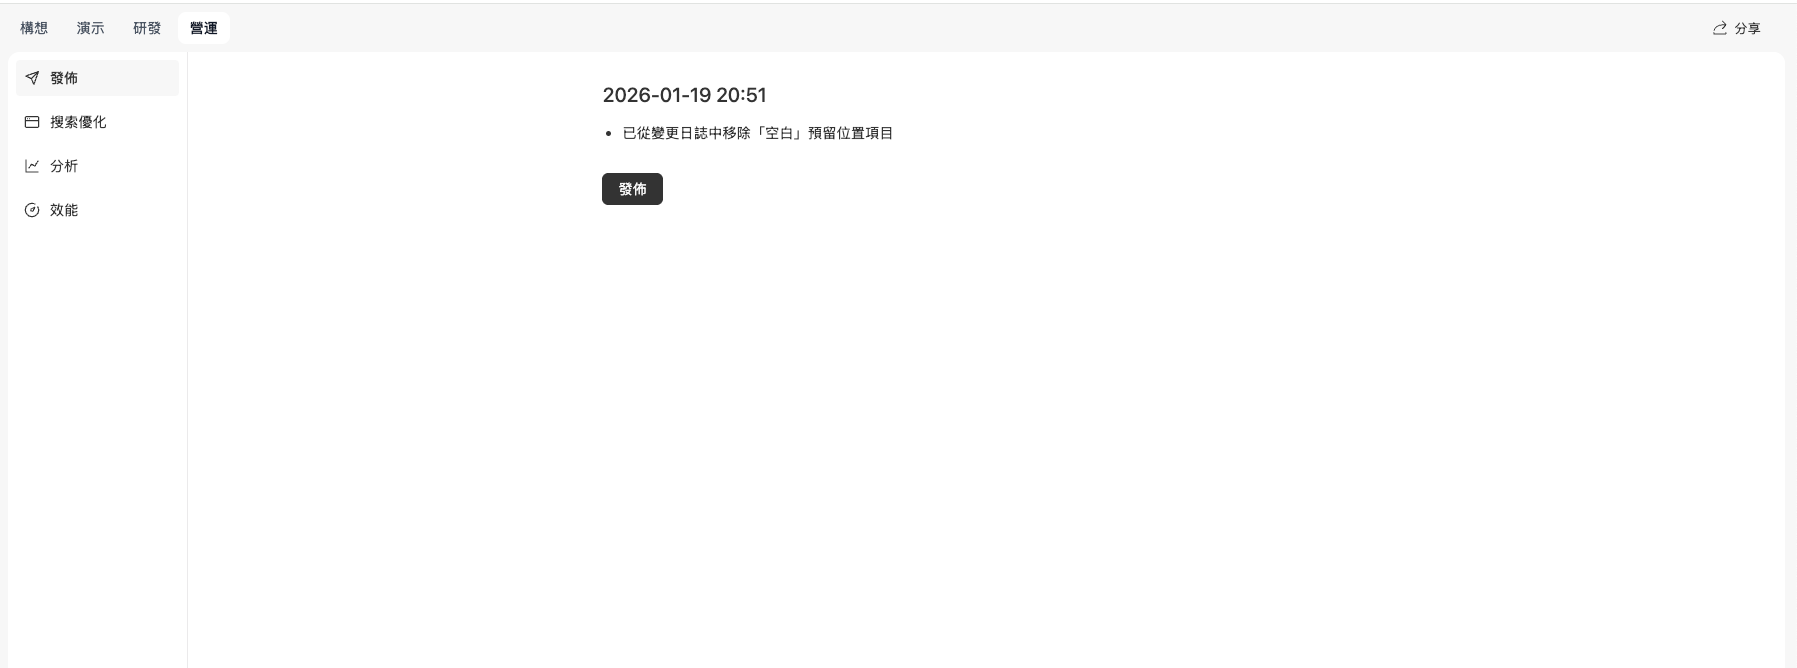
上线运营
- 点击「下一步,上线运营」,可以查看发布、搜索优化、分析和效能等上线相关的功能
- 所有功能都与应用上线有关
- 可以一键上线应用
- 优化搜索内容等功能
省钱:出 bug 时,别急着让它乱改
网站出差错或卡住时,先理解问题再修复,不要盲目修改. 常见情况:- 网站出差错或卡住,多点几次检修会检修
- 刷新不会丢资料,模型有时不太稳定,活已经做了但页面未更新
- 理解问题:把报错复制出来,问 AI:「这是什么意思,问题可能在哪」
- 确认思路:和 AI 讨论可能的解决方案
- 再修改:确认思路后再让它修改
- ❌ 一看到错误就让 AI 随便改
- ❌ 不分析问题就盲目修改
- ❌ 连续多次修改导致问题更复杂
- ✅ 先理解错误资讯
- ✅ 分析问题根源
- ✅ 制定修复方案
- ✅ 再执行修改
省钱:多用「聊天模式」想清楚,再让 AI 动手
先想再做,不要一上来就生成全部. 正确流程: 第一步:先聊天(点击输入框右下角的「免费咨询」):- 讨論想法
- 想清楚结构
- 问「这样合不合理」
- 确认方向和细节
- 让 AI 去生成或修改
- 基于讨論的结果实施
- 确保方向正确
- 避免生成不符合需求的内容
- 节省积分(聊天模式消耗更少)
- 提前发现问题
- 思路更清晰
具体指向页面或模块
具体指向页面或模块,明确说明要实现的功能. 好的范例:- 明确指出页面路径
- 说明具体位置(区域,模块)
- 描述要实现的功能