> ## Documentation Index
> Fetch the complete documentation index at: https://docs.superun.ai/llms.txt
> Use this file to discover all available pages before exploring further.

# 將線框轉換為高保真 UI

## 使用情境

你已經有一個粗略的線框稿,或只是由幾個矩形和占位區塊組成的簡單排版,\
想要把它快速變成一個看起來像成品的高保真介面.

## 挑戰

如果手動處理,想把線框變成像素級精緻的畫面,通常要花上好幾個小時:\
調整顏色,間距,字體,階層結構,網格與元件樣式等細節.

## 如何讓 Prompt.to.design 幫你完成

* 在 Figma 中選擇你的線框 Frame
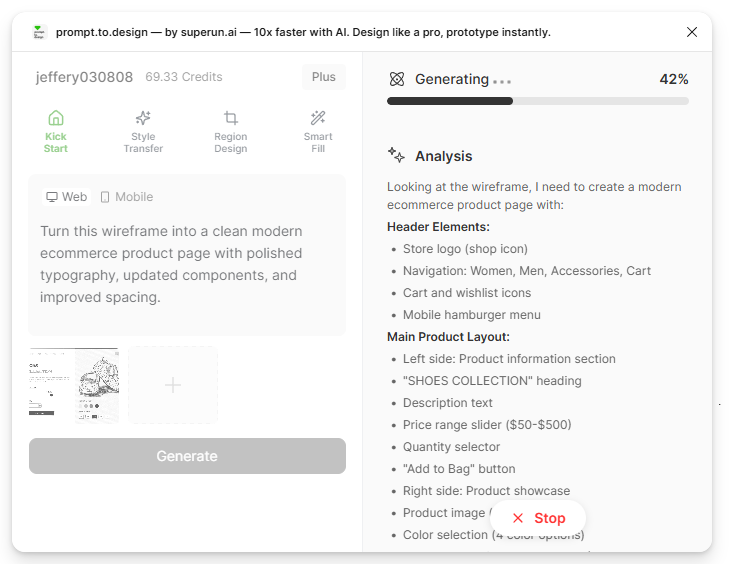
* 在 Prompt.to.design 中輸入一段描述「理想成品」的提示
* AI 會自動優化間距,顏色,排版,網格,組件與階層結構
* 產生一個乾淨,精緻,完全可編輯的高保真版面
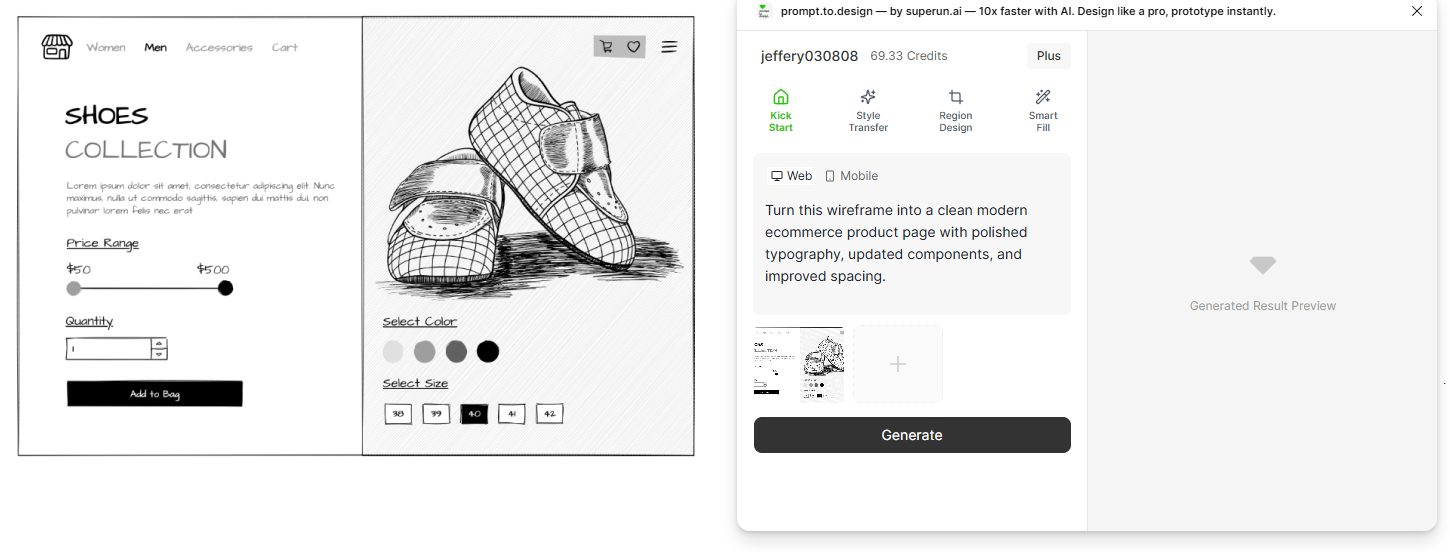
<img src="https://mintcdn.com/uxarts/AyY1SLtgmf3f_Ggt/images/wireframe/1.png?fit=max&auto=format&n=AyY1SLtgmf3f_Ggt&q=85&s=d3926dca7c23a027758addb7063f531f" alt="Wireframe selected with prompt entered" style={{ marginTop: '1rem', borderRadius: '8px' }} width="1449" height="552" data-path="images/wireframe/1.png" />

* 產生過程中,右側面板會顯示結構分析,元件對應與設計優化說明.

<img src="https://mintcdn.com/uxarts/AyY1SLtgmf3f_Ggt/images/wireframe/2.png?fit=max&auto=format&n=AyY1SLtgmf3f_Ggt&q=85&s=8ea49c81c39ad28f457eb993b4b71708" alt="AI analysis converting wireframe to high fidelity" style={{ marginTop: '1rem', borderRadius: '8px' }} width="729" height="564" data-path="images/wireframe/2.png" />

* 檢查高保真草稿,如果需要可以再微調提示,\
  或直接點擊 **Insert into Figma** 導入到 Figma 中繼續修改.
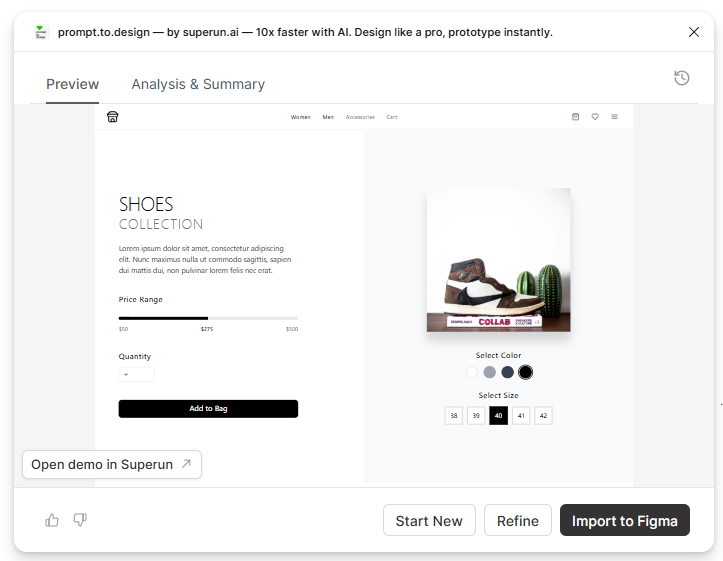
<img src="https://mintcdn.com/uxarts/AyY1SLtgmf3f_Ggt/images/wireframe/3.png?fit=max&auto=format&n=AyY1SLtgmf3f_Ggt&q=85&s=d3cbd97ffa42e468dd1bc6b071ea34f4" alt="Preview of high-fidelity output" style={{ marginTop: '1rem', borderRadius: '8px' }} width="723" height="561" data-path="images/wireframe/3.png" />

***

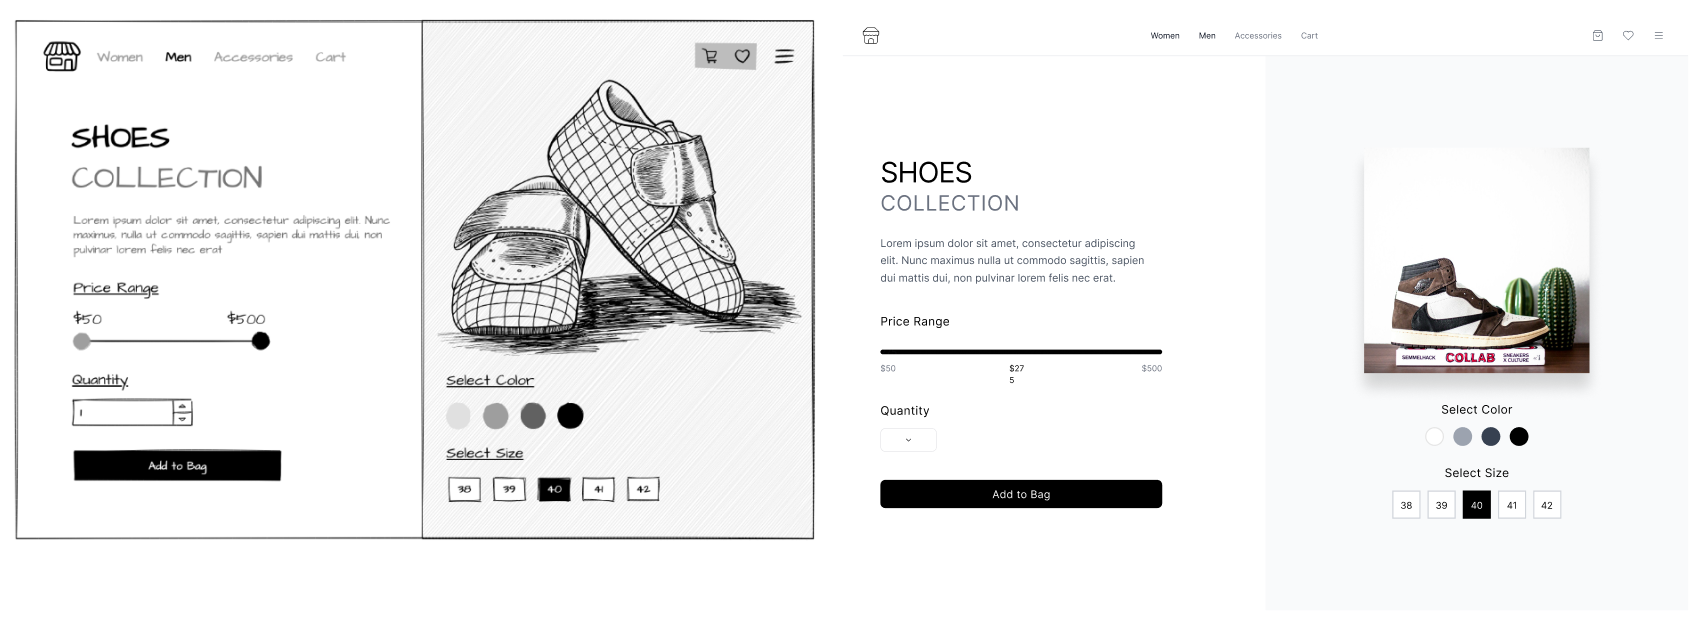
## ✔ 從低保真線框,一步到位產出高保真佈局

<img src="https://mintcdn.com/uxarts/AyY1SLtgmf3f_Ggt/images/wireframe/4.png?fit=max&auto=format&n=AyY1SLtgmf3f_Ggt&q=85&s=d35c719525f16f683c130f8a768b5cc0" alt="Final high-fidelity layout" style={{ marginTop: '1rem', borderRadius: '8px' }} width="1690" height="639" data-path="images/wireframe/4.png" />