> ## Documentation Index
> Fetch the complete documentation index at: https://docs.superun.ai/llms.txt
> Use this file to discover all available pages before exploring further.

# style转换

> 了解如何使用 Prompt.to.design 中的style转换功能,将现有 Figma Frame的设计style应用到新布局中.

import Image from '@/components/Image';

style转换允许您**生成全新的页面**,同时**保持现有 Figma Frame的视觉style**.
AI 将匹配所选Frame的color,排版,间距和布局模式.

当您希望新页面立即匹配文件中已有的设计系统时,请使用**样式转移**.

***

## 1. 选择 **style转移** 选项Card

打开 **Prompt.to.design** 插件,然后点击顶部的 **Style Transfer** 标签.\
此模式允许您选择现有Frame作为视觉参考.
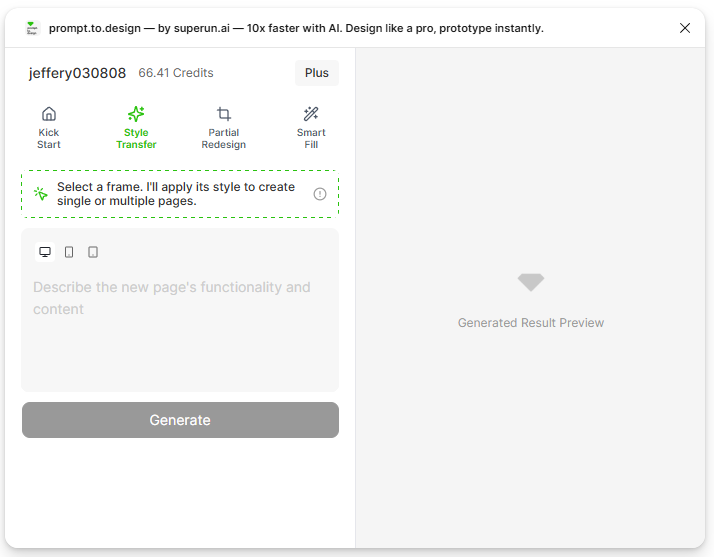
<img src="https://mintcdn.com/uxarts/RSHYLU0ts6AvUQJp/images/style-transfer/1.png?fit=max&auto=format&n=RSHYLU0ts6AvUQJp&q=85&s=f7fdd787ee8715c6dd577c46c97eac29" alt="Open the plugin and select the Style Transfer tab" width={700} data-path="images/style-transfer/1.png" />

***

## 2. 选择一个Frame作为您的style参考

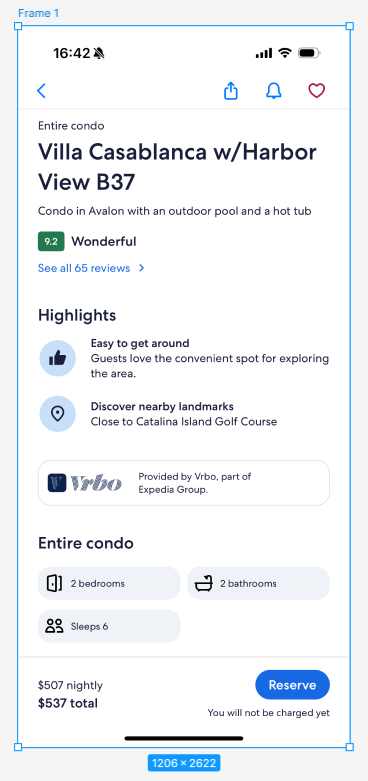
在您的 Figma 画布上,点击任何具有您想要重用的style的现有Frame.
这个Frame将成为您的**style参考**,它的color,排版,间距和组件模式将指导生成.

<img src="https://mintcdn.com/uxarts/RSHYLU0ts6AvUQJp/images/style-transfer/2_A.png?fit=max&auto=format&n=RSHYLU0ts6AvUQJp&q=85&s=47e1841426f829000740ef58c8559cd6" alt="单击一个Frame以设置为样式参考" width={600} data-path="images/style-transfer/2_A.png" />

<img src="https://mintcdn.com/uxarts/I3JOnALDZ5tIGfai/images/style-transfer/2_referenceframe.png?fit=max&auto=format&n=I3JOnALDZ5tIGfai&q=85&s=6dcceb06862594d1e5591fab2fc82c75" alt="选定的Frame用作样式参考" width={300} data-path="images/style-transfer/2_referenceframe.png" />

***

## 3.描述你想要生成的新页面

输入您想要的新页面布局的**简短描述**.\
AI 将使用所选Frame的样式生成页面结构.

提示示例:

> "生成酒店评论详细Info页面,包括帶有图像和评级的评论."
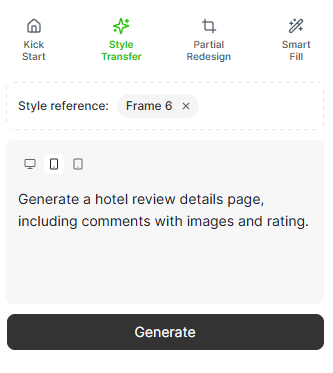
<img src="https://mintcdn.com/uxarts/RSHYLU0ts6AvUQJp/images/style-transfer/3.png?fit=max&auto=format&n=RSHYLU0ts6AvUQJp&q=85&s=9db02e254f28919c589a9b0129472abb" alt="输入新页面的提示,同时保持所选的style" width={350} data-path="images/style-transfer/3.png" />

***

## 4. 单击 **生成** 并查看预览

单击 **生成** 开始设计新页面的样式.
当预览出现时,您可以滚动或缩放以检查 AI 生成的布局.
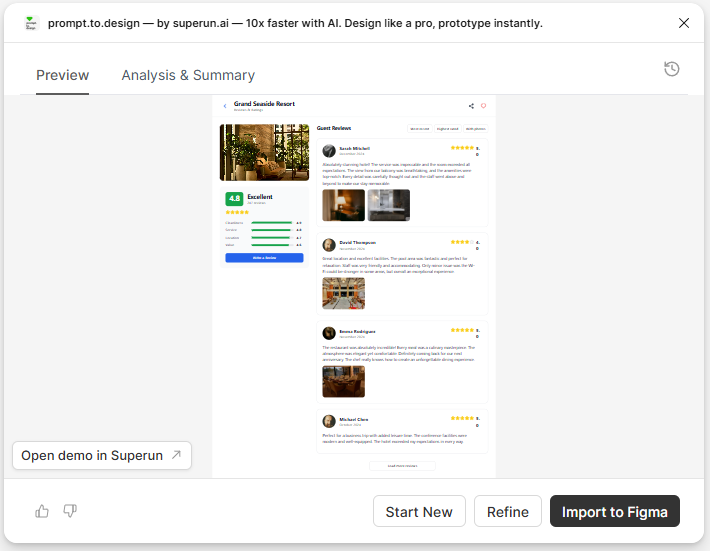
<img src="https://mintcdn.com/uxarts/I3JOnALDZ5tIGfai/images/style-transfer/5.png?fit=max&auto=format&n=I3JOnALDZ5tIGfai&q=85&s=2b22a0c0e7cd98f592d8bf2bf64d144d" alt="查看生成的页面预览" width={700} data-path="images/style-transfer/5.png" />

***

## 5. 将样式化的布局插入 Figma

点击 **Insert to Figma** 将生成的页面放置到您的画布中.\
将出现一个新Frame,与您选择的参考Frame样式一致且完全可编辑.
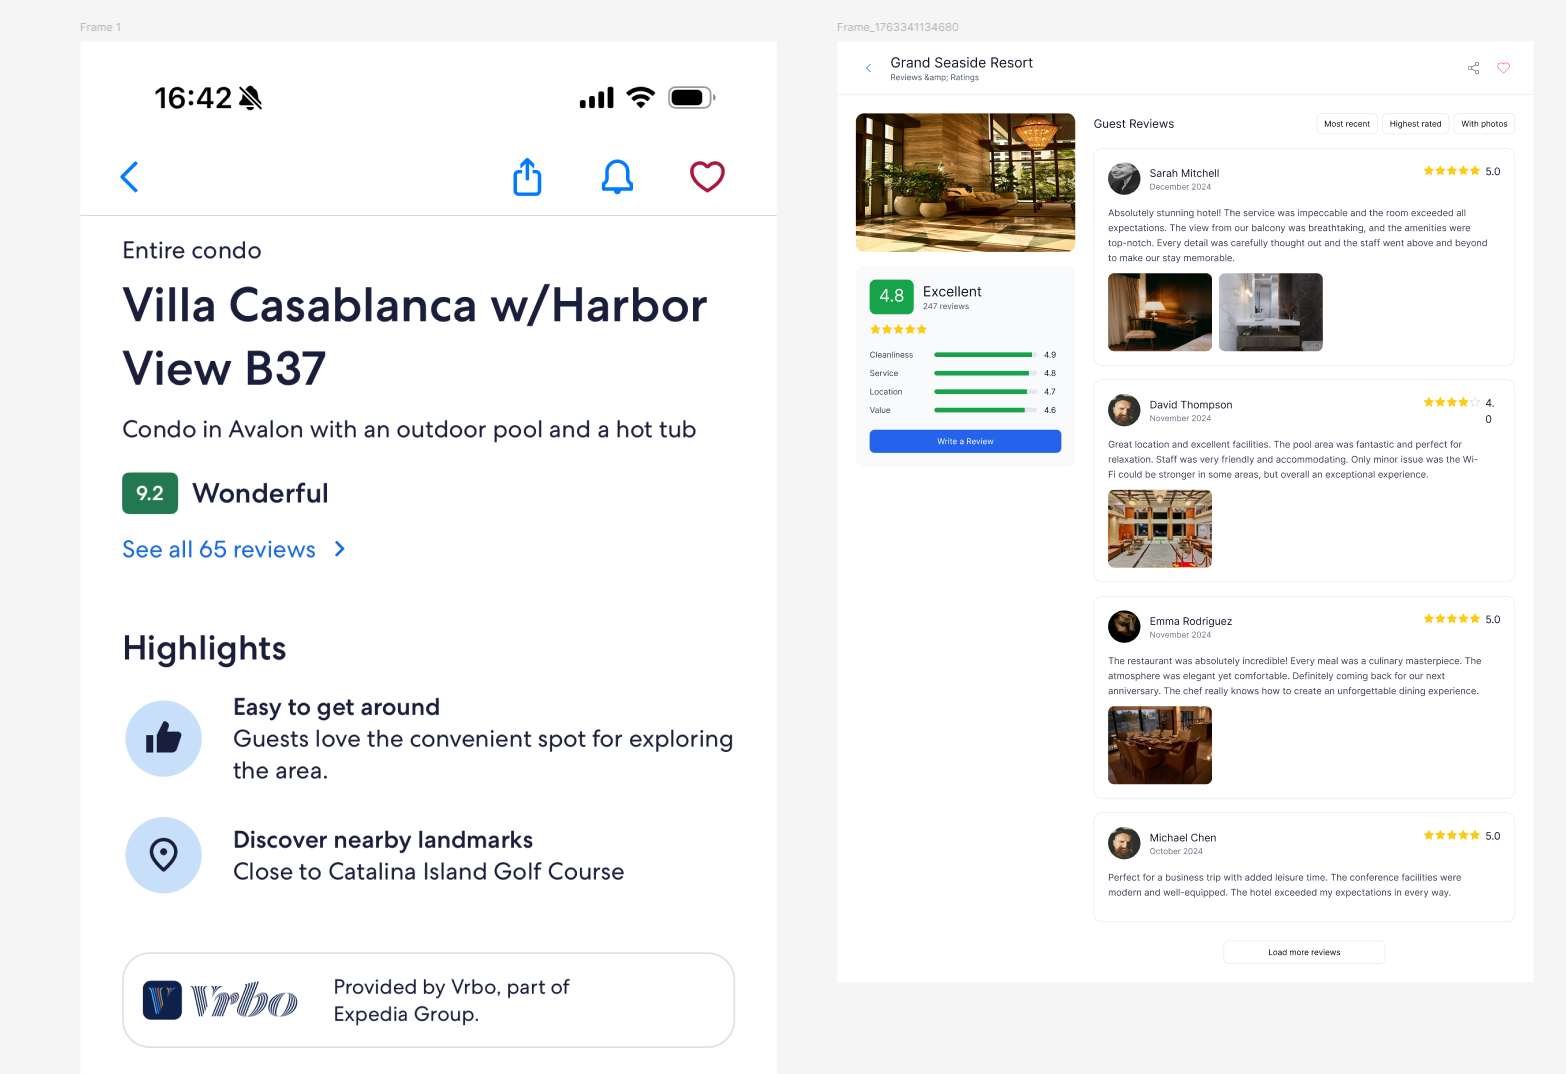
<img src="https://mintcdn.com/uxarts/vtpZBubVOPl7lv2-/images/style-transfer/6.png?fit=max&auto=format&n=vtpZBubVOPl7lv2-&q=85&s=3bed10328b0d82e1418662bfcc2e394c" alt="将style化的布局插入 Figma 作为新的可编辑Frame" width={700} data-path="images/style-transfer/6.png" />

***

## 概括

通过style迁移,您可以:

* 立即重用现有页面的视觉样式
* 保持color,字体,间距和 UI 元素一致
* 生成与您的设计系统相匹配的新页面
* 节省手动调整视觉细节的时间

样式传输非常适合在和一产品中构建多个页面或在不和内容类型中重复使用强大的视觉样式.

<div
  style={{
marginTop: '2rem',
display: 'flex',
justifyContent: 'center',
}}
>
  <a
    href="https://www.Figma.com/community/plugin/1528325292196938261/prompt-to-design-by-superun-ai-10x-faster-with-ai-design-like-a-pro-prototype-instantly"
    style={{
  backgroundColor: '#0F172A',
  color: 'white',
  padding: '12px 28px',
  borderRadius: '8px',
  fontSize: '16px',
  fontWeight: '600',
  textDecoration: 'none',
  boxShadow: '0 4px 12px rgba(0,0,0,0.08)',
  transition: 'all 0.2s ease',
}}
    onMouseOver="this.style.backgroundColor='#1E293B'"
    onMouseOut="this.style.backgroundColor='#0F172A'"
  >
    开始使用 Prompt.to.design 设计
  </a>
</div>